

Blending (Hourglass)
I have split this page into sections describing these subjects. The sections appear in the order I attacked the "problems", but most of the project is about blending. The code contains many comments in addition to what is described on this page. Information about the structure of the comments and of the application, and what the application does and does not do, is described in Application and code
I have used GL4Java [6] to develop this application.
Bezier surfaces
I will not explain the principles behind Bezier curves and surfaces; this is well taken care of in other modules.
I will focus on how I have implemented Bezier surfaces in my project, and what effect the different OpenGL calls had on the hourglass. This will hopefully increase your understanding of how OpenGL handles Bezier surfaces. In the section about animation I discuss Bezier curves and calculations on these.
When I started of I wanted to model an old fashioned hourglass, with onion shaped curves and the top and bottom cut off. The result became ClassicBulbs.java. (The other two hourglasses are variations on the original, with only control points and a few other values adjusted.
With the module Egg as a starting point I made the Bezier surfaces for the hourglass. In this module I found a way to set up the control points in a matrix shape that was well arranged and made it easy to get a picture of the result. Instead of inserting numbers directly into the matrix, they are stored in variables, as a result there are not so many values one have to keep control over. I used this solution, but changed the control point values and the axis system.

To make the Easter egg round there was also used a factor for radius compensation. The hourglass had to be even rounder (you will know why if you read about animation), so I used an additional factor to achieve this.
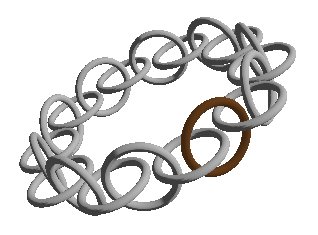
To the left the hourglass' axis system is shown. The origin is in the middle of the hourglass, the positive axes are colored; red X-axis, green Y-axis and blue Z-axis. The positive X-axis points horizontally to the right, the positive Y-axis points up and the positive Z-axis points directly towards you ("out" of the screen). It is possible to turn the axis system on and off; this function is available in the file menu in the application. It is also possible to watch lines between the control points of one of the Bezier surfaces. (The glass consists of four.)
The first that needs to be done when constructing a Bezier surface is to make a matrix array with control points. The glass and sand matrices are available in the subclass ClassicBulbs.java (and the rest of the *Bulbs classes). The following code is the drawBulbs() method in the super class Bulbs.java/
bulbsMaterial.enableMaterial(GL_FRONT_AND_BACK);
Activates the material chosen for the glass. The material got instantiated at the same time as the glass in the init() method in HourglassAnimCanvas.java. For more information about activation of material, see the section about blending.
gl.glMap2f(GL_MAP2_VERTEX_3,
           0.0f, 1.0f, 3, UN, 0.0f, 1.0f, 3*UN, VN, bulbCtrPoints);
Defines how the Bezier surface should be "interpreted" by OpenGL. Sets the values for the Bezier surface, the parameters are as follows:
- GL_MAP2_VERTEX_3 - tells OpenGL that every control point in the matrix consists of X, Y and Z-values for the point. When OpenGL evaluates the surface it generates glVertex3() instructions.
- 0.0f -Smallest value of u.
- 1.0f - Largest value of u.
- 3 - the distance in the matrix between the X-value for the first and second point in the u-direction.
- UN - number of control points in the u-direction (The variable got its value earlier (UN=5).)
- 0.0f - Smallest value of v.
- 1.0f - Largest value of v.
- 3*UN - the distance in the matrix between the X-value for the first and second point in the v-direction.
- VN - number of control points in the v-direction. (The variable got its value earlier (VN=5).)
- bulbCtroints - matrix array with control points. (Variable got instantiated earlier.)
gl.glEnable(GL_MAP2_VERTEX_3);
Activates GL_MAP2_VERTEX_3.
gl.glMapGrid2f(40, 0.0f, 1.0f, 30, 0.0f, 1.0f);

A Bezier surface consists of a grid net that can be displayed as points, lines or filled polygons. You can set the number of meshes in the net both ways. The first three parameters describe the u-direction (X-axis on the glass). I have asked for 40 meshes, and that the grid net should cover the whole surface (from 0 to 1). The last three parameters are the corresponding values for the v-direction (Y-axis on the glass).
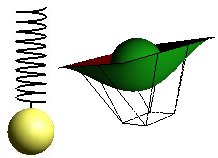
This provides you with the possibility to create grid nets that has meshes with uneven sizes for different parts of the surface. I have used one grid net for the whole surface for simplicity, but it could have been a solution to make the net coarser as the surface narrows. The more meshes in the net, the longer it takes OpenGL to calculate and draw the surface. Because of this I made the grid net as coarse as possible without reducing the appearance of the surface. This is a surface in the hourglass (top front) drawn with lines.
gl.glFrontFace(GL_CW);
Which side of a surface that should be interpreted as a front side by OpenGL depends on how the matrices are arranged. My matrices are arranged clockwise. The default in OpenGl is anti-clockwise (GL_CCW). I have to adjust this by telling OpenGLmatrices that the front should be GL_CW (clockwise).
gl.glPushMatrix();
gl.glEvalMesh2(GL_FILL, 0, 40, 0, 30); // Top front
gl.glRotatef(180.0f, 0.0f, 1.0f, 0.0f);
gl.glEvalMesh2(GL_FILL, 0, 40, 0, 30); // Top back
gl.glRotatef(180.0f, 0.0f, 0.0f, 1.0f);
gl.glEvalMesh2(GL_FILL, 0, 40, 0, 30); // Bottom back
gl.glRotatef(180.0f, 0.0f, 1.0f, 0.0f);
gl.glEvalMesh2(GL_FILL, 0, 40, 0, 30); // Bottom front
gl.glPopMatrix();
This code draws the four surfaces that the glass consists of. The method glEvalMesh2 works together with mapGrid2f, and because of this the parameters are almost the same. First we specify whether the net should be drawn as points (GL_POINT), lines (GL_LINE) or filled polygons (GL_FILL). Then the net is spread out on the surface. These are the parameters:
- GL_FILL - filled polygons
- 0 - corresponds to parameter 2 in glMapGrid2
- 40 - corresponds to parameter 1in glMapGrid2
- 0 -corresponds to parameter 4 in glMapGrid2
- 30 - corresponds to parameter 1 in glMapGrid2
gl.glFrontFace(GL_CCW);
Front face is adjusted back to default.
bulbsMaterial.disableMaterial();
The used material is disabled.
In the images below I have put lines between the surface control points. In the application it is also possible to view them for the other glasses. This improved my understanding for Bezier surfaces considerably. The code to draw these lines is in the drawBulbCtrPointLines() method in Bulbs.java. It can be useful to use on a surface you have made, I have made it a little more dynamical than it originally was, so if you change the variable names UN, VN and bulbCtrPoints, it should be possible to use anywhere.


The Bezier surfaces for the glass were not a big problem to make, not too much mathematics is needed to do this. It got harder when I wanted to use Bezier surfaces to model the sand, and I had to do calculations on one of the curves. Read more about this in the section about animation.
Glass is seldom paper-thin, it has a front and a back, hence a thickness. I tried to give the glass this thickness by adding another Bezier surface, and place it a little behind the first one. This worked fine in theory, but in practice I got problems with the blending and to make it get a natural look. I tried to fix this with cull facing, but to do this it is necessary to have a deeper understanding of both cull facing and blending than I achieved through this project. The way the hourglass turned out, pulling the sand in and away from the glass simulates the thickness of it. If you ask for a glass bottom as a stand in the application, the thickness of this will be equal to the thickness of the glass (distance between the glass and the sand).
Blending
[What is blending?]
[Alpha values]
[The blending function and depth buffer]
[Blending methods]
[My blending code]
What is blending?
Blending is used when you want to model an object that is entirely or partially transparent. In other words, to model objects consisting of materials like glass and plastic, but also to make shadows and other effects. There is more than one way to use blending, and it is possible to get the same result in several different ways.
In this section I will explain a few ways on how to use blending, tell you about my experiences and about how I used it in my project. I assume that you have some knowledge about light and materials, for example by reading first half of chapter 5, Lighting Redbook. It is also an advantage to know how the depth buffer works.
|
To illustrate the results I will use pictures of the glass. To clarify I have sooted the glass and drawn some "solid" spheres, a gold sphere in the top part of the container, a silver sphere in the lowest part and a brass sphere in the middle, behind the container. To the right are some pictures of what I wanted to achieve (the result). You can click the pictures, they will then pop up in a larger version and make it easier for you to compare. In short there are two things you have to do to make an object transparent. You have to state the alpha value of the material and you have to activate the blending function (glEnable(GL_BLEND)), and configure this. |
 |
 |
Alpha values
Alpha value is given as an argument together with the colors red, green and blue (The alpha value
is the A in RGBA) to OpenGL methods like glClearColor(), glColor*(), glLight*() and glMaterial*().
An alpha value can take on any value between 0 and 1, where 0 is completely transparent (the object will not
be visible) and 1 is solid.
The blending function and depth buffer
It is not possible to make an object transparent without activating GL_BLEND, you can do this by calling glEnable(GL_BLEND). Usually it is important to disable the blend when you have finished drawing. Disable the function by calling glDisable(GL_BLEND).
In addition to enabling/disabling you have to configure the blending, in other words, let the depth buffer know how the color pixel already in the depth buffer should be mixed with the color on the incoming pixel. To do this a method called glBlendFunc() is used, it takes two constants as parameters. The first constant states which values that should be included from the new objects that are being drawn (source). The second constant states which values that should be included from the objects already drawn that is kept in the depth buffer (destination). glBlendFunc() combines the result of these two. (The default combination is addition, to combine them with other calculations a subset of OpenGL has to be implemented.) To use the depth buffer it must be enabled, it can be enabled by calling glEnable(GL_DEPTH_TEST), usually in init(). There are many constants available as possible parameters for glBlendFunc(), and combinations of these and different settings when testing depth gives many possibilities when setting up blending.
To clarify: If you start by calling glEnable(GL_BLEND) and then call glBlendFunc(GL_ONE, GL_ZERO), nothing will happen. This means "take all values from the new pixel and add them with none of the values from the old pixel" this is the default setting for Open GL. (Provided that the default setting for the depth testing is kept (glDepthTest(GL_LESS).) All new objects are drawn without any of the ones behind being visible through the new ones.
I use glBlendFunc(GL_SRC_ALPHA, GL_ONE_MINUS_SRC_ALPHA) in my project; this is one of the settings most commonly used in the event of blending.
Blending methods
As said earlier, there are several ways to use blending. To find a blending method you can use you have to ask yourself some questions.
- Is the scene stationary or should it be possible to watch it from different angels?
- Are all or just a few of the objects going to be transparent?
- Will several transparent objects overlap one another?
Irrespective of what you are drawing depth testing has to be enabled with glEnable(GL_DEPTH_TEST). This is done in all of the following examples.
|
If the scene is stationary with only transparent objects, you can start by calling glEnable(GL_BLEND) and set the blending function with glBlendFunc(GL_SRC_ALPHA, GL_ONE_MINUS_SRC_ALPHA), and then draw the objects you want to be transparent with the alpha value you want. It is important to draw the object at the very back in the scene first, and the nearest one last, otherwise the blending will fail. If the scene consists of both transparent and solid objects the solid objects has be drawn before the blending function is activated. If they are drawn afterwards they will not be visible through the transparent object, see picture. |
 |
|
It was easy enough to make sure that the solid objects were drawn first, but soon another problem appeared. The glass consists of four Bezier surfaces put together, and even though I could draw them from behind and forward in the scene, it didn't help when I didn't want the scene to be stationary. When I rotated the glass the part in the back seemed to dark. It looked like the container had "cast borders" if I rotated it and some inexplicable "zebra stripes" appeared. If I looked at the container from the back I actually couldn't see the front through the back! The previous picture shows this to some extent, but I include one more. This "error" also marks the Farris bottle as you can see if you study it. |
 |
|
The problem described above is due to the scene not being stationary, I want to give the user of the application the
possibility to twist and turn the hourglass as much as him or her desire. I spent a long time searching for a solution,
but it was fascinating easy when I discovered it. |
 |
|
Now it doesn't matter in which order the transparent objects are drawn. Nor is it
important to disable the blending function after you are done with drawing the transparent
objects when you use glDepthMask(), but in return it is important to set the depth buffer back to normal
mode. This can be done by calling glDepthMask(GL_TRUE) |
 |
|
In my search for solutions for non-stationary scenes I came across Nehe Productions tutorial. If all the objects in a scene are going to be transparent, and have the same degree of transparency, you can use the method described in lesson 08, Blending, in Nehe's tutorial. In this example you can turn transparency on and off in the whole scene. This is achieved by specifying a blending color (In this case white and half transparent), and by setting the blending function with glBlendFunc(GL_SRC_ALPHA, GL_ONE) in init(). When the user asks for transparency GL_BLEND is enabled and the depth buffer disabled (it is turned completely off with glDisable(GL_DEPTH_TEST)), and the other way around when the user asks for solid objects. This is, as Nehe states in their tutorial, not the proper way to solve this problem, if you are looking for a more "sophisticated" solution it is not enough just to disable the depth buffer. If I tried this method on the glass I got problems with the spheres on the inside and outside of the container. If the spheres were drawn before the container it looked like the sphere behind the container was in front of it, and the other way around if the spheres were drawn afterwards. I also tried to change glBlendFunc(GL_SRC_ALPHA, GL_ONE) with glBlendFunc(GL_SRC_ALPHA, GL_ONE_MINUS_SRC_ALPHA) (my "regular" setting), but this made all the objects in the scene transparent, as you can see in the picture. |
 |
My blending code
The super class Material.java contains only twp methods. enableMaterial() is an "empty" method that all the subclasses have to implement; this is where the materials colors and other properties are enabled. enableMaterial() takes one argument, a constant that states on which side of the Bezier surface the material should be. disableMaterial() is a default method that sets glLightModeli() back to its original value. This method is superseded in the subclasses *GlassMaterial.java. (The only difference between the subclasses being color and alpha value on the material.)
The methods are called from a "material factory" in the drawBulbs() method that is described in the section about Bezier surfaces. This is the implementation of enableMaterial() in BlueGlassMateria.java.
gl.glEnable(GL_BLEND);
Enables the possibility to blend colors, so that it may be shown transparent.
gl.glDepthMask(GL_FALSE);
Sets the depth buffer in a read only mode (does NOT turn it off).
gl.glBlendFunc(GL_SRC_ALPHA, GL_ONE_MINUS_SRC_ALPHA);
Configures the blending function.
if (sideChoice == GL_FRONT_AND_BACK)
{
   gl.glLightModeli(GL_LIGHT_MODEL_TWO_SIDE,1);
}
Adjusts lighting. The first argument is a constant that states what light model we want to work on. The second argument is "true" (default is 0, "false"). This means that if there is material on both sides of the surface, both sides should react to light. The glass materials are the only materials that gets called with sideChoice = GL_FRONT_AND_BACK. This is important for the glass that consists of objects where the material on "the inside" is visible. If this is not set it will not be possible to see any shine from the inside.
float amb[] = {0.20f, 0.50f, 1.0f, 0.1f};
float diff[] = {0.20f, 0.50f, 1.0f, 0.1f};
float spec[] = {1.0f, 1.0f, 1.0f, 1.0f};
float shine = 0.8f; // The glass is very shiny

gl.glMaterialfv(sideChoice, GL_AMBIENT, amb);
gl.glMaterialfv(sideChoice, GL_DIFFUSE, diff);
gl.glMaterialfv(sideChoice, GL_SPECULAR, spec);
gl.glMaterialf(sideChoice, GL_SHININESS, shine * 128.0f);
The colors are set the usual way, but notice the last value in the first two arrays. This is the alpha value. The glass is set to be 90% transparent and the shine is set to a high value, since I just recently cleaned the glass surfaces ;-).
This is the code necessary to make an object transparent.
But as mentioned before, it is equally important to "tidy up" afterwards.
This is the implementation of disableMaterial(), it is identical for all the glass materials.
gl.glDisable(GL_BLEND);
Disables the possibility to blend colors.
gl.glDepthMask(GL_TRUE);
The depth buffer is set to read & write mode.
gl.glBlendFunc(GL_ONE, GL_ZERO);
The blending function is set to default.
gl.glLightModeli(GL_LIGHT_MODEL_TWO_SIDE, 0);
The light model is set to the default setting.
Not many lines with code, but to sum it up I would like to say the same thing about blending
as they say about chess; "A minute to learn, a lifetime to master." ;-D
Animation
Problem:
The sand is going to run down and make a growing heap in the lower part. When the bottom
of the heap reaches the glass walls, the sand should follow the walls + have a top.
In the top part the sand has to follow the glass walls and decrease with the same rate
as it increases in the lower part. In addition there has to be a "trickle" of sand from one
part to the other while the sand is running down.
Solution:
As mentioned in the section about Bezier surfaces I used the
glass' Bezier surfaces to make the part of the sand that follows the glass walls, but I pulled it in to
imitate that the glass has a thickness. I will not include code that shows how this is changed, or how I make
the material for the sand, because the solution is very much the same as for the glass that I described earlier.
I discovered that the sand in the two parts of the glass should be taken care of in different methods, since the shape of
the sand is very different in the two parts. This led to the methods called drawUpperSand() and drawLowerSand().
In addition there is a third method that draws sand, drawSandWhileTurning(), which is the method that draws a sphere
in the glass when the glass is turning (I will not comment any more on this). All of these methods are found in Bulbs.java. The methods
are called from the drawHourglass() method in HourglassAnimCanvas.java.
In the canvas' runAnimation() method the animation is run by changing arguments for drawUpperSand() and drawLowerSand(), I will
discuss this more at later stage.
Common for drawUpperSand() and drawLowerSand() is that they use clipping planes to control the level of sand, they remove the part
of the Bezier surfaces (Bezier sand from now on) that should be invisible. Both methods also call getPointOnCurve() that is used for placing
clip planes together with calculating radii for the sand by the clipping plane.
NB: All variable and method names that contains "upper" or "lower" has to with sand,
and indicate if it is sand in the lower or upper part. From now on I will describe the solution for the lower part, drawUpperSand() is a simplified
version of drawLowerSand().
Before the sand hits the wall it is referred to as lowerTinyHeap (a cone). When lowerTinyHeap has grown into
the Bezier sand, it stops to exist. In stead the Bezier sand is drawn and clipped in the right height,
and a bottom and a top (a cone as well, but not lowerTinyHeap) is added to it.
The Bezier sand's radius by the clipping plane and the cone's radius has to be the same for these parts to be able to
"slide as one" (That was why it was so important to make the glass completely round). Because
of this I needed a method that could return the radius (X value) for a given point on the Bezier curve. I also needed the
Y value for the point to be able to place the clipping plane at the right place. The X and Y control points for the curve, and a value stating
where on the curve the radius value should be calculated had to be input for the method.
A general description of a Bezier curve:
B is the X, Y, and Z values, n is the number of control points and t is the length of the curve in the point called B.
With this it should be possible to calculate the values for the desired point. In hope that I would not have to reinvent the wheel I
searched the net and found a function written in Delphi with OpenGL on Sulaco,
in an application called BezierCreator.
This method takes a 3.degree Bezier curve (four control points), in my case the Bezier curve was of 4.degree (5 control points). By the use
of Pascal's triangle it was easy to extend the method to take a 4.degree curve as input, the coefficients in the formula became 1,4,6,4,1.
The method getPointOnCurve() receives 5 arrays, each consisting of X, Y and Z values for a control point on a Bezier curve, and a value for the t-step. t is a value between 0 and 1 that states where on the curve's length the point should be calculated, when the length of the curve is 1. I'll include the complete method here.
public float[] getPointOnCurve(float[] p0, float[] p1, float[] p2,
                               float[] p3, float[] p4, float t)
{
   // An array that contains the X, Y and Z values for
   // the desired point
   float curvePoint[] = new float [3];

   // A few variables to shorten the expressions.
   // This makes it easier to read
   // (and saves the need to do calculations later)
   float omT = 1.0f - t; // (1 - t)
   float omTi2 = omT * omT; // (1 - t)^2
   float omTi3 = omT * omT * omT; // (1 - t)^3
   float omTi4 = omT * omT * omT * omT; // (1 - t)^4
   float ti2 = t * t; // t^2
   float ti3 = t * t * t; // t^3
   float ti4 = t * t * t * t; // t^4

   //The formula that finds a point on a 4.degree curve
   /*curvePoint	= p0 * omTi4
		+ p1 * 4 * omTi3 * t
		+ p2 * 6 * omTi2 * ti2
		+ p3 * 4 * omT * ti3
		+ p4 * ti4;*/

   // X values
   curvePoint[0] = p0[0] * omTi4
		+ p1[0] * 4 * omTi3 * t
		+ p2[0] * 6 * omTi2 * ti2
		+ p3[0] * 4 * omT * ti3
		+ p4[0] * ti4;
   // Y values
   curvePoint[1] = p0[1] * omTi4
		+ p1[1] * 4 * omTi3 * t
		+ p2[1] * 6 * omTi2 * ti2
		+ p3[1] * 4 * omT * ti3
		+ p4[1] * ti4;
   // Z values
   curvePoint[2] = p0[2] * omTi4
		+ p1[2] * 4 * omTi3 * t
		+ p2[2] * 6 * omTi2 * ti2
		+ p3[2] * 4 * omT * ti3
		+ p4[2] * ti4;

   // Returns the array with the X, Y and Z values
   // describing the desired point
   return curvePoint;
}
If the curve function had been linear, t=0.5 would be the point in the middle on the curve (all "t-steps"
have the same length).
The Bezier function is not linear and the length on the "t-steps" depends on the curve's control points.
The "t-steps" will vary in length.
Now it's time to have a look at drawLowerSand(), the Method takes 4 parameters:
- boolean needsBottomLowerSand - states if the sand should be drawn as Bezier sand with a top, or as tinyLowerHeap.
- boolean trickle - states if the "sand trickle" is drawn or not.
- float lowerT - the t-value for the Bezier sand.
- float lowerTinyHeapRadius - tinyLowerHeap's radius.
This is the code inside the method (pseudo code starts and ends with //... ):
// Gets the X and Y values for lowerT, send the curve in
// the wrong way to make lowerT = 1 a full lower glass
float lowerTPoint[] = getPointOnCurve( ...controlpointarrays..., lowerT);

//The Y-value for lowerT is used to set where on the Y-axis
// the clipping plane should be, (also works as a "ground plate" for the Bezier sand's cone).
float lowerCutoff = - lowerTPoint[1];
System.out.println("  lowerCutoff er: " + lowerCutoff);

// The X-value is the Bezier sand's radius at the clipping plane
//(also the cone's radius at the Bezier sand).
float lowerTPointXValue = lowerTPoint[0];

// The radius for the sand pile's ground plate.
float lowerSandBottomDiskRadius;

// If the sand should follow the glass "walls" upwards, the glass' Bezier surfaces
// are used as a starting point, before they are clipped with the clipping plane.
if (needsBottomLowerSand)
{

   // Defines and enables the lowest clipping plane, it should make
   // the part on the negative side of the Y-axis from lowerCutoff visible.
   double lowerCutplane[] = {0.0, -1.0, 0.0, (double)lowerCutoff};
   gl.glClipPlane(GL_CLIP_PLANE0, lowerCutplane);
   gl.glEnable(GL_CLIP_PLANE0);

   //...
   //Creates and draws the Bezier sand
   //...

   // Disables the used clipping plane
   gl.glDisable(GL_CLIP_PLANE0);

   //...
   //Draws the top of the pile (the Bezier sand) (the sand has "hit the wall")
   //...

   // Sets the radius to the sand pile's "ground plate".
   lowerSandBottomDiskRadius = getEndSandRadius();
}
// If the sand hasn't hit the wall yet
else
{
   // Sets the radius to the sand pile's "ground plate"
   lowerSandBottomDiskRadius = lowerTinyHeapRadius;

   //...
   //Draws lowerTinyHeap
   //...
}

// The sand needs a bottom plate (lowerSandBottomDisk)
// since the glass' bottom can be made of glass

//...
//Draws the sand's bottom
//...

// Draws a trickle only when it is necessary
if(trickle)
{
	//...
	//Draw trickle
	//...
}
drawUpperSand() is basically like drawLowerSand(), but takes only one parameter, upperT.
When lowerT increases the sand rises in the lower part, when upperT
decreases the sand in the top part decreases as well.
drawHourglass() should be easy to understand:
// EVERYTHING THAT IS SUPPOSED TO BE VISIBLE THROUGH THE GLASS HAS TO BE DRAWN FIRST
// Draws axes if the user requested it.
if (axesClicked)
{
   drawAxes();
}

// Draws lines between control points if the user has requested it
if (ctrPointsClicked)
{
   bulbs.drawBulbCtrPointLines();
}

// Draws stand
stand.drawStand();

// The sand can only be drawn if the hourglass has a classical shape
if(bulbs.toString().equals("Classic"))
{
   // Draws sand if the user has requested it (and it is legal)
   if (wantSand)
   {
	  // Enables the sand's material here
	  // to avoid many calls in Bulbs
      bulbs.activateSandMaterial();

	  // If the glass is not turning we want to draw the sand properly
      if (!isTurning)
      {
		 // The glass needs sand in its lower part
         bulbs.drawLowerSand(needsBottomLowerSand,
             trickle, lowerT, lowerTinyHeapRadius);

		 // If the glass needs sand in its top part
         if (needsUpperSand)
         {
            bulbs.drawUpperSand(upperT);
         }
      }
	  // If the hourglass is turning we simulate the sand
      else
      {
	     bulbs.drawSandWhileTurning();
      }

	  // Disables sand material here
	  // to avoid many calls in Bulbs
      bulbs.deactivateSandMaterial();
   }
}
// Draws the glass
bulbs.drawBulbs();
The tool I use for animation is a GLAnimCanvas, which is a basic class for animations in GL4Java.
The advantage with this compared to a regular GLCanvas is a full implementation of JAVA2's multi-threading
possibilities.
Whether the animation shall run is decided in display() by a boolean variable called turnButtonClicked, default value
is false. If it is changed to true a counter (frameCounter) is started, and then runAnimation() is called, it takes care of
incrementing the variables between each "picture" in the animation. In runAnimation the animation starts when
frameCounter equals 1, with start(). When the animation has finished (frameCounter has reached the number
of pictures we were going to show) it stops, with the stop() command, counters gets reset and turnButtonClicked is set to false.
Since I am using GLAnimCanvas I don't have to call display() manually, start(0 and stop() takes care of it, and display() is called automatically.
I use display anyway if there is something that needs to change because the user has made a choice in the menu.
drawHourglass() is called from showScene(), which is called from display().
Another advantage with GLAnimCanvas is that it gives the user the possibility to turn the glass while the animation is running, and
use the menus. The exception is changing the shape of the glass, I have made that illegal during animation.
I will not include the code for runAnimation(), it is long and there are many variables to keep track of, especially because there were many last minute adjustments. But it should be well commented, so you can read through it. I know this solution could be a bit more elegant, but the last pieces of the animation puzzle didn't fit until the latest hours of the project, so there was no time for tidying up. My goal was to complete the animation for the classical shape. This works for the modern shape as well, so you can watch these two shapes with sand. I never came around to the bizarre shape, you can admire it, but unfortunately without sand. In HourglassAnimCanvas.java you will find code not discussed here, but it is also well commented. I have not included pictures that illustrate the animation, run the application :-).
The program and the code
I decided early in the project that I would use Java's object orientation. As a result of this I have spilt the application in a
number of classes, to separate the different subjects from each other. Do not be intimidated by the number of classes,
there is just a few you have to study to understand the OpenGL part. I have used more of Java's strong sides, like
inheritance and polymorphism. I have used a Design Pattern called Factory Method (The class is called MaterialFactory)
to instance different materials (colors). This is a frequently used design pattern in Java, which makes it easy to make new
instances of subclasses. If you are interested I recommend a book called "Patterns in Java" by Mark Grand.
The foundation for this structure I got from one of my earlier projects at Østfold College.
To get an overview of the application's structure I made a simple model. This model was helpful during the development. I also made an API documentation, there you will find an overview of the classes and their methods. I have tried to give methods and variables self-explaining names to make the code easier to read. In some of the classes there are methods that have names that start with "test", these are methods that were used for testing during development. I have kept the methods, but I don't call them in the code.
In addition to the API, the code has been plentiful commented (in Norwegian),
and a lot of explaining is included there that is not discussed on this page. You will find that most of the comments is about OpenGL,
with only a few about the "ordinary" Java code. The Norwegian comments follow this structure (with very few exceptions):
If a comment is directly behind a code line it only applies to this line.
If a comment is directly above a loop it applies to the entire loop.
If a comment is directly above an if-test it applies for this test, if there is
an else-statement there will be a comment over this as well.
If a comment is directly above a code line, this applies until a new comment over a line of code appears.
I addition there are some comments written in capital letters, I think you will get the meaning of these when you see them.
What will you see, and what can you do in the hourglass application?
The application is "controlled" by menus, two command buttons and a mouse to rotate the scene.
In the menu you can choose between three different types (shapes) of glass, ClassicBulbs, ModernBulbs and BizarreBulbs.
Each of these has a their own stand, ClassicStand, ModernStand and BizarreStand which can be viewed in brass or ebony. There is also
a simple green plate available as a stand for all the types of glass, and it is possible use a glass bottom. The color of the glass can be blue, green or sooted,
while the sand is available as red or lemon yellow.
In the file menu there is an option that gives you the possibility to turn the hourglass' axis system on and off, and/or
the control points for one of the glass' Bezier surfaces. It is also possible to remove the sand, to give you a nice view of
the blending (have a look at the bizarre shape with blue glass and a glass bottom :-)). NB: The bizarre hourglass shape
has no sand, the reason for this is discussed in Animation.
The command button called "Originalposisjon" (Original position) starts an animation of the hourglass, it is turned
and the sands runs from the top part to the lower part. NB: While the hourglass is turning the sand is symbolized by a "sand colored"
sphere, the reason for this is discussed in Animation.
The mouse is used for rotating the scene.
A great deal of the code for menus (and belonging code) I had from earlier projects at Østfold College. Working with this and making new types
of glass and stands, worked as therapy when I struggled with my "main problems". I got a break from thinking, but at the same time I
worked with the project. I recommend it :-D.
Working with the stands and the glasses gave me good knowledge about common OpenGL calls like pushing and popping matrices,
translations and rotations (I have not discussed these on this page). The stands gave me experience with Quadrics, and the glasses gave
me a better idea about what's inside my matrices.
Possible extensions
The possibilities for extensions are many ;->.
- The possibilities to extend with new hourglass shapes, stands, glass- and sand colors are unlimited. The hourglass shapes are made up of Bezier surfaces with 5 x 5 control points. An idea would be to make the application more dynamic and support other combinations of control points.
- Animate the sand while the hourglass is turning. The challenge here would be to put a lid on the sand in the top part of the hourglass.
- Create a thickness for the glass by modeling an inside surface, make the glass' alpha values dependent of the glass' thickness.
- Use textures. Put textures on both sand and stands.
- Make a background. This would help to show off the blending.
- Make shadows.
