Skeletal Animation (Skinning)
Skeletal Animation - How does it work?
As mentioned, when you animate using skeletal animation, you don't animate the mesh directly, but build a skeleton within the mesh and animate the skeleton instead. So how does the mesh get animated?
It's natural to start with the mesh. When the mesh is satisfactory we build a skeleton. You start with the root of the skeleton and add joints as needed to build a realistic skeleton. Each joint stores at a bare minimum the translation and the rotation relative to it's parent. The parent is either a joint or origo as is the case for the root joint. This makes up an easy treestructure that is ideally suited for animation. If a joint changes it's rotation all of the child joints gets transformed as well.
Every vertex is tied to at least one joint through an influence. An influence stores the vertex, the joint index and a weight which specify how much influence the joint has over the vertex. A vertex can have several influences but only one for each joint. The sum of all the weights in a vertex' influences should always be 1.0. This is process is often called skinning because the mesh can be seen as a virtual skin over the skeleton.
The positure of the model and skeleton when the skinning is performed gets stored as the default pose or the bind pose. This positure is essential in calculating the vertices when it's time to animate. An animation consists of several frames. Each frame potentially updating the transformation of all the joints in the skeleton. This can be done in at least two ways. Some choose to store the transformation of all the animated joints at each frame. In this case you can just read the new transformation from the animation. The other solution is to store keyframes and calculate the in between transformation using interpolation. In this case the new transformation can be read from the animation at keyframes and calculated on the frames in between. In either of the case the following has to be performed. You find the inverse transformations of the default pose and multiply it with the updated transformations of the animated pose. You now have a tranformation for each animated joint wich can be used to transform the vertices based on the skinning data.
My Implementation
Here you can read more about my implementation of a skeletal animation system. The system is made up of several parts. All developed from scratch for this project.
Maya Exporter (RiTE Exporter)
The first thing you need a when creating a skeletal animation system is a model or mesh which you can animate using a skeleton. I chose to build my model with Maya since I'm more comfortable with the GUI of Maya then any other 3d modeller. Maya supports many different export formats such as VRML, OBJ and many more out of the box, but none of these seemed to fit my needs. So decided to write my own epxorter. In retrospect I probably could have managed with one of the more complex ones but I wanted the experience of developing my own.
The Maya API is rather complex, and there's not too much infomation about it on the web. So the development of the custom exporter has been a challenge. Most of the knowledge has come from seeing how others have done it and from alot of testing. This has taken alot of time and effort, but that only makes the end result so much sweeter. There's still alot to be done, espacially on the material and shader side, but all the essentials are there.
The format consists of several files which hold different information about the model. RAM is the mesh definition, RAS is the shader information and RAA is the animation data. I've chosen not to use texturing in this project, so the shader file can be excluded.
RAM (RiTE Ascii Model)
The RAM file contains the skeleton and mesh data in the following format.
Joint Definitions
JOINT_ID "JOINT_NAME"
	parent PARENT_JOINT_ID
	orientation X Y Z W
	translation X Y Z
	rotation X Y Z W
This is the format of every joint in the skeleton. First you have the JOINT_ID which is a unique integer which identifies the joint. Then you have the name of the joint. This is also most likely unique, but I've chosen to identify by an integer instead. Then there's the keyword parent followed by an integer identifying the parent joint. The root joint has -1 as the parent. The three next lines are the transformation of the joint. First you have the orientation which is there to make the rotations more intuitive. The orientation is the rotation of the joint's origo relative to the parent joint's orientation and it's defined as a quaternion. Then comes the translation which is the relative offset to the parent joint. The translation is defined using a three dimensional vector. Then there's the rotation. The rotation is also defined using a quaternion. The rotation is relative to the parent rotation, but it's also relative to the joint's orientation.
Mesh Definition
Each RAM file contains only one mesh definition. This definition contains all the vertices, normals, uvs, triangles and weights.
Vertices
VERTEX_ID X Y Z
Every vertex is defined with an integer identifier and a three dimensional vector.
Normals
NORMAL_ID X Y Z
Every normal is defined with an integer identifier and a three dimensional vector. The normals are all normalized.
UVs
UV_ID X Y
Every uv or texture coordianate is defined with an integer identifier and a two dimensional vector. The project doesn't use textures so the uvs are never used by the application.
Triangles
TRIANGLE_ID SHADER_ID VERTEX_ID VERTEX_ID VERTEX_ID NORMAL_ID NORMAL_ID NORMAL_IS UV_ID UV_ID UV_ID
Every triangle in the mesh is defined with an integer identifier, a shader identifier, three vertex identifiers, three normal identifiers and three uv identifiers. The vertex, normal and uv identifiers define the triangle, and the shader identifier defines which shader to use for the face.
Weights
WEIGHT_ID VERTEX_ID JOINT_ID "JOINT_NAME" W
The weights is what defines the skin. This is what ties the mesh to the skeleton. Each weight is defined using an integer identifier, a vertex identifier to tell which vertex is influenced, a joint identifier and name to tell which joint the vertex is influenced by and the weight which tells how much the joint influences the vertex.
RAA (RiTE Ascii Animation)
The RAA file contains the animation data. I've chosen not to support translations in my animations. The reason for this is that I wanted to easily use the same animation on several models using the same skeleton. The problem is that though two models use the same skeleton the relative translations and orientations doesn't have to be the same. Therefore it seemed logical to leave it out.
Tracks
track TRACK_ID JOINT_ID "JOINT_NAME"
Each animated joint has it's own animation track. Each track is defined with an integer identifier and a joint identifier and name to tell which joint the track belongs to. Each track has at least one keyframe
Keyframes
KEYFRAME_ID FRAME_NUMBER X Y Z W
Each keyframe is defined using an integer identifier, the frame number at which the keyframe occurs and a quaternion to define the new rotation of the joint. This rotation is as in the skeleton definition relative to the parent.
The Render Application
The entire solution has been developed in C#.NET using OpenGL through Tao. I chose this platform for the easy integration with standard Win32 controls suchs as sliders and checkoxes. Ideally I would have implemented it with C++ since this is the language where I have the most experience, but I must say that C# rose to the occation. I'm quite impressed with the performance and the ease of development of this environment. The application is also ment as a testbed for the animation system which I'm hoping to integrate into my own 3d engine written in C++ at a later stage. If the performance is good enough in C#, I should have no problem implementing it with even better performance in C++. The solution is split into three projects.
OpenGLFramework

This is the main project. The project contains code for setting up and executing the main application. This includes setting up the window with OpenGL support, handling all the application events and rendering the window with all the content.
There are a number of controls in the main window for modifying the mesh which is rendered. There's a region for controlling the mesh and one for controlling the animations. Let us look at the controls for the mesh first. There's a combo box for switching between models. My application has two models to chose from. One made to resemble a man, and one model built just to show that you can switch between models. These are called Male and Switch respectively. There's also three checkboxes which control how the mesh is rendered. The skin checkbox if checked makes the application render the skin. The wireframe checkbox makes the application render the mesh as a wireframe. The skeleton checkbox makes the application draw the skeleton. It doesn't actually draw the skeleton. It just renders the joints as small coordinate systems. The red axis is the X axis, the green axis is the Y axis and the blue is the Z axis.
The animation controls the animations. There's two buttons. One for playing and pausing the animation, and one for stopping the animation. The latter sets the mesh back to the bindpose and resets all the current animations which means that it sets the frame number back to the first frame. There's a slider in this group which control the speed of the animation. This slider indicates the number of animation frames per second. The slider ranges from 1 to 50. The wave checkbox turns on and off the dominant animation wave. More on what dominant animations are later. The walk animation cycle is always enabled.
There's two sliders around the rendering pane. These control the camera. The horizontal rotates the model around the Y axis, and the vertical control rotation around X axis (In my application the Y axis point up).
SkeletalAnimation
This project contains all the skeletal animation code such as skeleton and mesh classes. It also contains classes for loading models and animations.
Mesh Classes
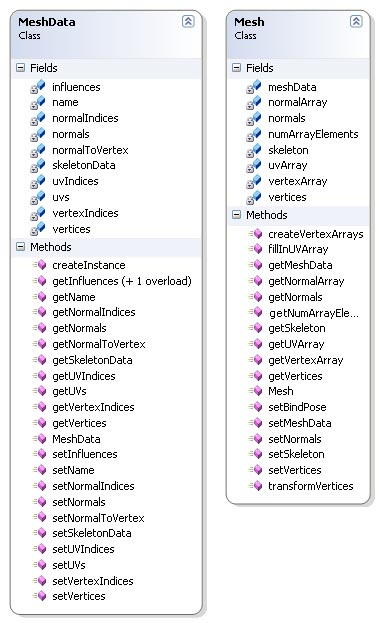
The mesh classes are MeshData and Mesh. These classes contains code that handle everything related to meshes. The two classes have several similarities when it comes to member variables and methods, but they are very different logically. MeshData is the main mesh representation. It holds all the shared data in a mesh. The Mesh class is an instance of a mesh which is create by the createInstance method in MeshData. This shared data design is used extensively throughout the application.
MeshData's methods mainly consists of get and set methods. The only other method worth mentioning is the createInstance method. This method creates an instance of the mesh which then can be animated. As mentioned this instance is an instance of the Mesh class. The method creates empty data arrays in the mesh instance with the same size as the arrays in MeshData for holding the animated mesh data. The UVs unlike vertices and normals are filled on creation with a call to fillInUVArray which is described later. I've posted the code for createInstance below.
The Mesh class has several of methods worth mentioning. First off lets look at createVertexArrays. I use vertex arrays in my rendering architecture so this method creates these arrays based on how many triangles there are in the mesh. It doesn't fill in the arrays, it just creates them. These arrays has the postfix Array to seperate them from the arrays which hold the animated vertices and normals.
Then there's fillInUVArray. This method fills in the uv array which then is used when rendering. The reason for this approach is that there's no need to update the uv array each animated frame because the uvs are never transformed by the skeleton. This method is called as we saw above when the instance of the mesh is created.
The most important methods in Mesh is transformVertices. This is the method which tranform each and every vertex and normal according to the joint rotations at each frame in the animation. The first step in this algorithm is to build arrays of tranformation matrices and rotation matrices. These matrices are calculated by multiplying the absolute transformation or rotation matrix from the instansiated joint and multiplying it with the inverse matrix of the corresponding joint in the MeshData instance. The next step is to transform the vertices. For each vertex we retrieve the vertex' influences, get the tranformation matrices for the joints wich influences the vertex, multiply it with the weight of the inflence then add them all together. The original vertex is then transformed by the resulting matrix and thus gets animated according to the skeleton. A similar operation is performed on all the normals, but using the rotation matrices instead of the transformation ones. This becaus the normals needn't be translated. After the vertices and normals are calculated the arrays which are used during rendering are filled with the new values. The complete code is posted below.
Code Listing - MeshData.createInstance()
/**
 * Create an instance of the mesh data
 */
public Mesh createInstance() {
	Mesh mesh = new Mesh();

	mesh.setMeshData(this);
	mesh.setSkeleton(skeletonData.createInstance());
	mesh.setVertices(new double[vertices.Length]);
	mesh.setNormals(new double[normals.Length]);

	mesh.createVertexArrays(vertexIndices.Length);
	mesh.fillInUVArray();

	return mesh;
}
Code Listing - Mesh.transformVertices()
/**
 * Transform the vertices
 */
public void transformVertices() {

	// Find the joint transformations and rotations
	ArrayList joints = skeleton.getJoints();
	Matrix[] transformations = new Matrix[joints.Count];
	Matrix[] rotations = new Matrix[joints.Count];
	for(int i=0; i< joints.Count; i++) {
		Joint joint = (Joint)joints[i];

		// Transformed * Original.. This seems backwards to me....
		transformations[i] = joint.getAbsoluteTransformation() *
		joint.getJointData().getAbsoluteTransformationInverse();

		rotations[i] = joint.getAbsoluteRotation().toMatrix() *
		joint.getJointData().getAbsoluteRotation().toMatrix().getTransposed();
	}

	// Transform the vertices
	double[] orgVertices = meshData.getVertices();
	for(uint vertexIndex=0; vertexIndex< meshData.getInfluences().Length; vertexIndex++) {

		ArrayList vertexInfluences = meshData.getInfluences(vertexIndex);
		int influenceIndex = 0;
		BoneInfluence influence = (BoneInfluence)vertexInfluences[influenceIndex];
		Matrix jointTrans = transformations[influence.boneId] * influence.weight;
		Matrix totalTrans = jointTrans;
		for(influenceIndex=1; influenceIndex< vertexInfluences.Count; influenceIndex++) {
			influence = (BoneInfluence)vertexInfluences[influenceIndex];
			jointTrans = transformations[influence.boneId] * influence.weight;
			totalTrans = totalTrans + jointTrans;
		}
		Vector orgVertex = new Vector(orgVertices[vertexIndex*3],
			orgVertices[vertexIndex*3+1], orgVertices[vertexIndex*3+2]);

		Vector vertex = totalTrans * orgVertex;
		vertices[vertexIndex*3] = vertex[0];
		vertices[vertexIndex*3+1] = vertex[1];
		vertices[vertexIndex*3+2] = vertex[2];
	}

	// Transform the normals
	double[] orgNormals = meshData.getNormals();
	uint[] normalIndices = meshData.getNormalIndices();
	uint[] normalToVertex = meshData.getNormalToVertex();
	uint[] vertexIndices = meshData.getVertexIndices();
	int numNormals = normals.Length / 3;

	for(int normalIndex=0; normalIndex< numNormals; normalIndex++) {

		// Find the rotation of the corresponding vertex
		uint vertexIndex = normalToVertex[normalIndex];
		ArrayList vertexInfluences = meshData.getInfluences(vertexIndex);
		int influenceIndex = 0;
		BoneInfluence influence = (BoneInfluence)vertexInfluences[influenceIndex];
		Matrix jointRot = rotations[influence.boneId] * influence.weight;
		Matrix totalRot = jointRot;
		for(influenceIndex=1; influenceIndex< vertexInfluences.Count; influenceIndex++) {
			influence = (BoneInfluence)vertexInfluences[influenceIndex];
			jointRot = rotations[influence.boneId] * influence.weight;
			totalRot = totalRot + jointRot;
		}

		Vector orgNormal = new Vector(orgNormals[normalIndex*3],
			orgNormals[normalIndex*3+1], orgNormals[normalIndex*3+2]);

		Vector normal = totalRot * orgNormal;
		normals[normalIndex*3] = normal[0];
		normals[normalIndex*3+1] = normal[1];
		normals[normalIndex*3+2] = normal[2];
	}

	// Fill in vertex arrays
	for(int index=0; index< numArrayElements; index++) {
		vertexArray[index*3] = vertices[vertexIndices[index]*3];
		vertexArray[index*3+1] = vertices[vertexIndices[index]*3+1];
		vertexArray[index*3+2] = vertices[vertexIndices[index]*3+2];

		normalArray[index*3] = normals[normalIndices[index]*3];
		normalArray[index*3+1] = normals[normalIndices[index]*3+1];
		normalArray[index*3+2] = normals[normalIndices[index]*3+2];
	}
}
Skeleton Classes
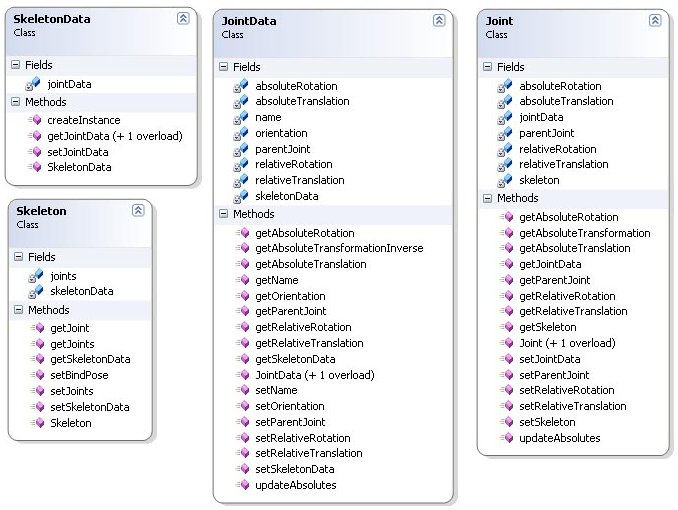
The skeleton classes are SkeletonData, Skeleton, JointData and Joint. These classes use the same shared data design as the mesh classes. SkeletonData and JointData stores all the shared data, and Skeleton and Joint are instances of SkeletonData and JointData respectively.
The SkeletonData class like MeshData has a createInstance method which returns a new instance of the skeleton as an instance of the Skeleton class. SkeletonData uses objects of the JointData class to build the skeleton. The Skeleton class uses objects of class Joint. So this method creates copies of it's owm JointData objects as Joint objects in the skeleton. The code can be seen below with the other code listings for the skeleton classes.
The Skeleton class contains methods for getting and setting the joints in the skeleton. It also has a reference to the SkeletonData class which it was created from. There's not much else to this class, so no code is listed.
JointData is the joint class used in the SkeletonData class to build the shared data for the skeleton meaning the default transformation of the joints. The skeleton stored in the RAM file only contains the relative transformations, so this class has a method updateAbsolutes for calculating the absolute rotation and translation. This method is only called once for each joint. This is when the skeleton is read from file. The relative rotation and translation never change, so there's no need to call it again. The code is listed below. The JointData class also has a method for returning the inverse transformation matrix which is used to animate the vertices as I have mentioned in the documentation of the mesh classes. This code is also posted below.
The Joint class is the instance version of JointData. The class contains a reference to the JointData class it was created from. This is to easily access the shared data of the joint. The Joint class contains two methods worth mentioning that correspond to the methods mentioned for JointData, updateAbsolutes and getAbsoluteTransformation. Unlike the updateAbsolutes in JointData this one is called for each animation frame. The method getAbsoluteTransformation returns the absolute transformation matrix of the joint. Not the inverse transformation matrix as in JointData. This methods is also used for animating the vertices. The code for both methods are listed below.
Code Listing - SkeletonData.createInstance()
/**
 * Create an instance of this skeleton
 */
public Skeleton createInstance() {
	Skeleton skeleton = new Skeleton();

	ArrayList joints = new ArrayList(jointData.Count);
	foreach(JointData jData in jointData) {
		Joint joint = new Joint(jData);
		joint.setSkeleton(skeleton);
		joints.Add(joint);
	}

	skeleton.setJoints(joints);

	skeleton.setSkeletonData(this);

	return skeleton;
}
Code Listing - JointData.updateAbsolutes()
/**
 * Calculate the absolute rotation and translation
 */
public void updateAbsolutes() {
	if(parentJoint != -1) {
		JointData parent = skeletonData.getJointData(parentJoint);
		absoluteRotation = parent.absoluteRotation * orientation * relativeRotation;
		absoluteTranslation = parent.getAbsoluteTranslation() +
			relativeTranslation.rotate(parent.absoluteRotation);
	}
	else {
		absoluteRotation = new Quaternion(orientation * relativeRotation);
		absoluteTranslation = new Vector(relativeTranslation);
	}
}
Code Listing - getAbsoluteTransformationInverse()
/**
 * Return the inverse absolute transformation matrix
 */
public Matrix getAbsoluteTransformationInverse() {

	Matrix rot = absoluteRotation.toMatrix().getTransposed();

	Vector temp = rot * absoluteTranslation;
	Matrix trans = new Matrix();
	trans.loadIdentity();
	trans[12] = -temp[0];
	trans[13] = -temp[1];
	trans[14] = -temp[2];

	return trans * rot;
}
Code Listing - Joint.updateAbsolutes()
/**
 * Update the absolute rotation an translation
 */
public void updateAbsolutes() {
	if(parentJoint != -1) {
		Joint parent = skeleton.getJoint((uint)parentJoint);
		absoluteRotation = parent.absoluteRotation * jointData.getOrientation() * relativeRotation;
		absoluteTranslation = parent.absoluteTranslation + relativeTranslation.rotate(parent.absoluteRotation);
	}
	else {
		absoluteRotation = new Quaternion(jointData.getOrientation() * relativeRotation);
		absoluteTranslation = new Vector(relativeTranslation);
	}
}
Code Listing - Joint.getAbsoluteTransformation()
/**
 * Return the absolute transformation matrix
 */
public Matrix getAbsoluteTransformation() {

	Matrix rot = absoluteRotation.toMatrix();

	Matrix trans = new Matrix();
	trans.loadIdentity();
	trans[12] = absoluteTranslation[0];
	trans[13] = absoluteTranslation[1];
	trans[14] = absoluteTranslation[2];

	return trans * rot;
}
Animation Classes
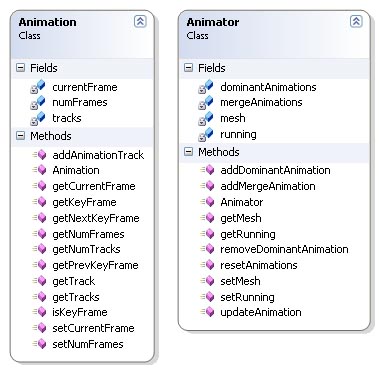
The animation classes are Animation and Animator. The Animation class is the animation itself and the Animator class is the class that does the animation.
The Animation class contains one or more animation tracks depending on the animation. Each track represent the animation of one joint throughout the complete animation. Each track has one or more keyframes which tell the rotation of a joint at a single frame. The rotations of the frames in between the keyframes has to be calculated (interpolation). The class contains several significant methods that the Animator class uses to animate the skeleton correctly. These methods are used to find keyframes. The code is listed below.
The Animator class performs the actual animating of the skeleton. The class has a reference to the mesh which is to be animated and two arrays for holding the current animations. There's two types of animation in my implementation. Mergeable ones and dominant ones. Unfortunately the mergeable animations implementation isn't finished, but they are essential to the design of the system. Mergeable animation are animations that blend together based on weights. An animation can have a weight between 0.0 and 1.0. If the weight is 1.0 then that animation is the only one affecting the skeleton, but if you have two animations, each with a weight of 0.5, these animations would have to be blended. You would then end up with an animation that is the average of these two. An example could be walking and running animations. As mentioned this isn't completed yet so my application only contains one mergeable animation which is walking. The other type, dominant animations, are animation that overwrite the existing animation on the affected joints completely. No blending is performed. An example is waving which is the dominant animation available in my application. There's a couple of issues with this type of animation as well which I'll talk more about in Future Improvements.
The most significant method in the Animator class is updateAnimation. This method produces the animation by looking through all the active animations. For each animation it checks the current frame against all the animation tracks. If the current frame is a keyframe, the rotation is set directly by looking up the rotation in that keyframe. If the frame is in between keyframes, the method calculates how many frames since the last keyframe and how many to the next. It then calculates the current rotation by interpolating using SLERP. This is a method in my quaternion library. The algorithm calculates the mergeable animations first, then it calculates the dominant ones. This makes the dominant animation overwrite the existing animation on the same the joints animated in the dominant one. The last steps of the algorithm is to update the absolute transformations of the joints in the skeleton and transforming the vertices for rendering. The code is listed below.
Code Listing - Animation.isKeyFrame()
public bool isKeyFrame(int trackIndex, uint frame) {
	AnimationTrack track = (AnimationTrack)tracks[trackIndex];
	for(int i=0; i< track.keyFrames.Count && frame >= ((KeyFrame)track.keyFrames[i]).frame; i++) {
		if(frame == ((KeyFrame)track.keyFrames[i]).frame) {
			return true;
		}
	}
	return false;
}
Code Listing - Animation.getKeyFrame()
public KeyFrame getKeyFrame(int trackIndex, uint frame) {
	AnimationTrack track = (AnimationTrack)tracks[trackIndex];
	KeyFrame key = new KeyFrame();
	for(int i=0; i< track.keyFrames.Count; i++) {
		if(frame == ((KeyFrame)track.keyFrames[i]).frame) {
			key = (KeyFrame)track.keyFrames[i];
			break;
		}
	}
	return key;
}
Code Listing - Animation.getNextKeyFrame()
public KeyFrame getNextKeyFrame(int trackIndex, uint frame) {
	AnimationTrack track = (AnimationTrack)tracks[trackIndex];
	KeyFrame key = (KeyFrame)track.keyFrames[0];
	for(int i=0; i< track.keyFrames.Count; i++) {
		if(frame < ((KeyFrame)track.keyFrames[i]).frame) {
			key = (KeyFrame)track.keyFrames[i];
			break;
		}
	}
	return key;
}
Code Listing - Animation.getPrevKeyFrame()
public KeyFrame getPrevKeyFrame(int trackIndex, uint frame) {
	AnimationTrack track = (AnimationTrack)tracks[trackIndex];
	KeyFrame key = (KeyFrame)track.keyFrames[track.keyFrames.Count-1];
	for(int i=0; i< track.keyFrames.Count; i++) {
		if(frame < ((KeyFrame)track.keyFrames[i]).frame) {
			if(i != 0) {
				key = (KeyFrame)track.keyFrames[i-1];
			}
			break;
		}
	}
	return key;
}
Code Listing - Animator.updateAnimation()
public void updateAnimation() {
	if(!running) {
		return;
	}

	// Loop through all the merged animations
	for(int animationIndex=0; animationIndex< mergeAnimations.Count; animationIndex++) {
		Animation animation = (Animation)mergeAnimations[animationIndex];

		// If we've reached the end of the animation loop
		if(animation.getCurrentFrame() == animation.getNumFrames()-1) {
			animation.setCurrentFrame(1);
		}
		else {
			animation.setCurrentFrame(animation.getCurrentFrame()+1);
		}

		int numTracks = animation.getNumTracks();
		for(int i=0; i< numTracks; i++) {
			AnimationTrack track = animation.getTrack(i);

			// If the current frame is a keyframe
			if(animation.isKeyFrame(i, animation.getCurrentFrame())) {
				KeyFrame keyFrame = animation.getKeyFrame(i, animation.getCurrentFrame());
				mesh.getSkeleton().getJoint(track.jointId).setRelativeRotation(keyFrame.rotation);
			}

			// If we need to interpolate
			else {
				KeyFrame nextKey = animation.getNextKeyFrame(i, animation.getCurrentFrame());
				KeyFrame prevKey = animation.getPrevKeyFrame(i, animation.getCurrentFrame());

				double keySpan;
				if(nextKey.frame < prevKey.frame) {
					keySpan = animation.getNumFrames() - prevKey.frame + nextKey.frame;
				}
				else {
					keySpan = nextKey.frame - prevKey.frame;
				}

				double keyOff;
				if(animation.getCurrentFrame() < prevKey.frame) {
					keyOff = animation.getNumFrames() - prevKey.frame +
						animation.getCurrentFrame();
				}
				else {
					keyOff = animation.getCurrentFrame() - prevKey.frame;
				}

				Quaternion rotation = Quaternion.slerpNoInvert(prevKey.rotation,
					nextKey.rotation, keyOff/keySpan);

				mesh.getSkeleton().getJoint(track.jointId).setRelativeRotation(rotation);
			}
		}
	}

	// Loop through all the dominant animations
	for(int animationIndex=0; animationIndex< dominantAnimations.Count; animationIndex++) {
		Animation animation = (Animation)dominantAnimations[animationIndex];

		// If we've reached the end of the animation loop
		if(animation.getCurrentFrame() == animation.getNumFrames()-1) {
		animation.setCurrentFrame(1);
		}
		else {
			animation.setCurrentFrame(animation.getCurrentFrame()+1);
		}

		int numTracks = animation.getNumTracks();
		for(int i=0; i< numTracks; i++) {
			AnimationTrack track = animation.getTrack(i);

			// If the current frame is a key frame
			if(animation.isKeyFrame(i, animation.getCurrentFrame())) {
				KeyFrame keyFrame = animation.getKeyFrame(i, animation.getCurrentFrame());
				mesh.getSkeleton().getJoint(track.jointId).setRelativeRotation(keyFrame.rotation);
			}

			// If we need to interpolate
			else {
				KeyFrame nextKey = animation.getNextKeyFrame(i, animation.getCurrentFrame());
				KeyFrame prevKey = animation.getPrevKeyFrame(i, animation.getCurrentFrame());

				double keySpan;
				if(nextKey.frame < prevKey.frame) {
					keySpan = animation.getNumFrames() - prevKey.frame + nextKey.frame;
				}
				else {
					keySpan = nextKey.frame - prevKey.frame;
				}

				double keyOff;
				if(animation.getCurrentFrame() < prevKey.frame) {
					keyOff = animation.getNumFrames() - prevKey.frame +
						animation.getCurrentFrame();
				}
				else {
					keyOff = animation.getCurrentFrame() - prevKey.frame;
				}

				Quaternion rotation = Quaternion.slerpNoInvert(prevKey.rotation,
					nextKey.rotation, keyOff/keySpan);

				mesh.getSkeleton().getJoint(track.jointId).setRelativeRotation(rotation);
			}
		}
	}

	// Update the absolutes
	uint numJoints = (uint)mesh.getSkeleton().getJoints().Count;
	for(uint i=0; i< numJoints; i++) {
		mesh.getSkeleton().getJoint(i).updateAbsolutes();
	}

	mesh.transformVertices();
}
Util
This project contains all the util classes. There's a Vector class, a Matrix class, a Quaternion class and a Camera class. Let us look at The Vector class first.
Vector Class
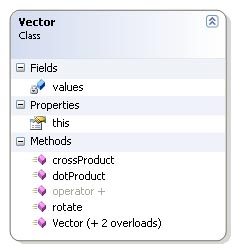
The vector class is very simple. Only the methods needed in the application are implemented. The class represents a three dimensional vector with the standard x, y and z values. The values are stored in an array of doubles of length 3. The values are accessible through an indexer. This means that the client code can use [] to access the values. This indexer is the this property in the diagram to the right.
The Vector class has a method named rotate. This method rotates the vector with a quaternion. I'll talk about quaternions later, but as a little introduction a quaternion has four elements. x, y, z, and w. The way the rotation is performed is to convert the vector to a "pure" quaternion. This involves copying the x, y and z values and setting w to 0.0. Let us call this quaternion p and the quaternion which we'll rotate with q. To rotate the vector you multiply q p q*. Here q* is the conjugate quaternion of q. More on that later (See the Quaternion class). When this multiplication is performed, it's just a matter of converting the result back to a vector. This is done by copying the x, y and z from the result back into a vector which is the returned to the client. Code listing below.
Code Listing - Vector.rotate
/**
 * Rotate this vector around a quaternion
 * @param vector - The quaternion we wish to rotate with
 */
public Vector rotate(Quaternion quaternion) {

	// Create a "pure" quaternion from the vector
	Quaternion qVector = new Quaternion();
	qVector[0] = values[0];
	qVector[1] = values[1];
	qVector[2] = values[2];
	qVector[3] = 0;

	// Rotate the pure quaternion
	Quaternion qResult = quaternion * qVector * quaternion.getConjugate();

	// Convert back to vector
	Vector ret = new Vector();
	ret[0] = qResult[0];
	ret[1] = qResult[1];
	ret[2] = qResult[2];

	return ret;
}
Matrix Class
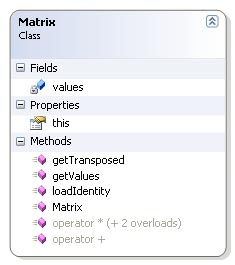
The Matrix class is very simple. Only the functionality needed has been implemented.
The matrix is a 4 x 4 matrix. The values are stored in an array of doubles with length 16. The values are stored in the same way OpenGL stores it's matrices. Index 0 through 3 is the first column, index 4 through 7 is the second column, index 8 through 11 is the third and index 12 through 15 is the last column. This can be quite confusing at first.
The class contains as the vector class an indexer which provide access to the values through the [] operator. The methods in the class are getTransposed which return the transposed matrix, getValues which simply return the whole values array and loadIdentity which set the values back to the identity matrix. The class also contains a couple of operator overloaders that overload the addition and multiplication operators. The multiplication operator has three overloads. One for multiplication with another matrix, one for multiplication with a vector and one for multiplication with a scalar. No code is listed for this class since the operations are quite self explainatory.
Quaternion Class
First let's look at why I chose to base my solution on quaternions instead of regular matrices. The most obvious reason is to save memory. A matrix require 16 elements (4 x 4) to store rotation and translation. This can be done with 7 elements using quaternions. 4 elements for the quaternion which store rotation and 3 elements in a vector to store translation. This isn't much to talk about in an environment such as this project. A much more important factor is the need to interpolate from one position to the next in our animations. Quaternions is much better suited for this purpose then matrices. Interpolating quaternions is quite easy seen from a math point of view and produce nice looking results.
General quaternions are an extension of complex numbers. Complex numbers are defined in
terms of i which is the square root of -1. A complex number is represented as a real number
and a multiple of i: a + bi. Here a is the real number and b is the multiple. Quaternions extend
the concept by using three square roots of -1, i, j and k.
i*i = -1
j*j = -1
k*k = -1
Multiplication of the different complex numbers behave much like a cross product.
i*j=-j*i=k
j*k=-k*j=i
k*i=-i*k=j
When you use quaternions to represent rotations, you use the subset of quaternions with
|q| = x^2 + y^2 + z^2 + w^2 = 1^2.
Multiplication and addition of quaternions are defined much like the addition and multiplication of
regular complex numbers. Let us take a look at the multiplication.
q1 * q2 = (w1 + x1*i + y1*j + z1*k) * (w2 + x2*i + y2*j + z2*k)
= (w1*w2 - x1*x2 - y1*y2 - z1+z2)
+ (y1*z2 - z1*y2 + w1*x2 + x1*w2)i
+ (z1*x2 - x1*z2 + w1*y2 + y1*w2)j
+ (x1*y2 - y1*x2 + w1*z2 + z1*w2)k
Multiplication is used to concatenate rotations. The implementation of quaternion multiplication in my
class can be seen below with the other code listings.
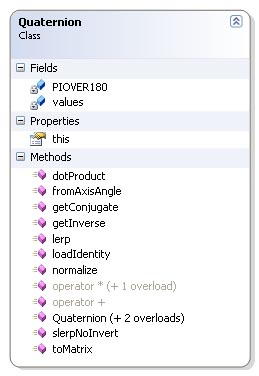
Now let us look at the other operations defined for my quaternion class. The dotProduct method behaves exactly like the dotProduct in my vector class, and the result is the same, cos a * |q|. Since all our quaternions are unit quaternions the result of this method is just cos a. No code is listed for this method.
getConjugate and getInverse essentially does the same thing, but this require some explaination. The conjugate is defined as q* = [-x -y -z w]. The inverse is defined as 1/q = q*/|q| but since we're only working with unit quaternions this becomes the same. loadIdentity loads the multiplacation identity of the quaternion which is q = [0 0 0 1]. The normalize method makes sure that |q| is in fact 1. If not it divides the quaternion by |q|. No code is listed for these four methods.
The method toMatrix is a bit more complex. The method converts the quaternion to a 4 x 4 matrix. I won't go into the details behind this conversion for the main reason that I lack the tools to make it readable. It could easily be done with latex, but I haven't got any experience what so ever with this tool, and I lack the time to learn it now. There's plenty information on it on the web, and the math isn't that complex. I recommend reading the "Matrix-Quaternion Conversion" article in Game Programming Gems by Jason Shankel for a full and very comprehendable walkthrough. The code for this method is posted below.
Now let's look at the interpolation methods. We'll start with the simplest one, LERP. LERP is a quasi acronym for Linear Interpolation. What this method does is calculate the interpolation between two quaternions using a linear function t. The definition for LERP is: LERP(q1, q2, t) = 1-t*q1 + t*q2. LERP doesn't preserve magnitude so we'll have to normalize the result before returning. The code for this method is posted below.
SLERP is represented as the method slerpNoInvert in my Quaternion class. SLERP is a quasi acronym for spherical interpolation. A unit quaternion define a point on a four dimensional hypersphere. SLERP produces smoother animations than LERP by following the great arc connection the two points on this sphere. SLERP is defined as: SLERP(q1, q2, t) = [q1*sin(a(1-t)) + q2*sin(a(t))] / sin(a) where a is the angel between the two quaternions. Unlike LERP, SLERP preserves magnitude, so no normalization is needed. If the angle between the two quaternions become small enough, the implementation switches to LERP. The reason for the NoInvert postfix is that it is usual to invert the interpolation if the dotproduct between the two quaternions is below 0.0. This is to minimize the angular distance the interpolation has to follow. My method doesn't do this, because I haven't seen the need for it yet. Code for this method is posted below.
Code Listing - Quaternion.multiplication
/**
 * Multiplication with other quaternion
 */
public static Quaternion operator *(Quaternion left, Quaternion right) {
	Quaternion ret = new Quaternion();

	ret[0] = left[1]*right[2] - left[2]*right[1] + left[3]*right[0] + left[0]*right[3];
	ret[1] = left[2]*right[0] - left[0]*right[2] + left[3]*right[1] + left[1]*right[3];
	ret[2] = left[0]*right[1] - left[1]*right[0] + left[3]*right[2] + left[2]*right[3];
	ret[3] = left[3]*right[3] - left[0]*right[0] - left[1]*right[1] - left[2]*right[2];

	return ret;
}
Code Listing - Quaternion.toMatrix()
/**
 * Return a matrix equivalent to the quaternion.
 * @remark
 *	Assumes the quaternion is normalized (x^2 + y^2 + z^2 + w^2 = 1). No
 *	test is performed to check.
 */
public Matrix toMatrix() {
	Matrix ret = new Matrix();

	// Row 1
	ret[0] = 1 - 2*(this.values[1]*this.values[1] + this.values[2]*this.values[2]);
	ret[4] = 2*(this.values[0]*this.values[1] - this.values[3]*this.values[2]);
	ret[8] = 2*(this.values[3]*this.values[1] + this.values[0]*this.values[2]);
	ret[12] = 0;

	// Row 2
	ret[1] = 2*(this.values[0]*this.values[1] + this.values[3]*this.values[2]);
	ret[5] = 1 - 2*(this.values[0]*this.values[0] + this.values[2]*this.values[2]);
	ret[9] = 2*(this.values[1]*this.values[2] - this.values[3]*this.values[0]);
	ret[13] = 0;

	// Row 3
	ret[2] = 2*(this.values[0]*this.values[2] - this.values[3]*this.values[1]);
	ret[6] = 2*(this.values[1]*this.values[2] + this.values[3]*this.values[0]);
	ret[10] = 1 - 2*(this.values[0]*this.values[0] + this.values[1]*this.values[1]);
	ret[14] = 0;

	// Row 4
	ret[3] = 0;
	ret[7] = 0;
	ret[11] = 0;
	ret[15] = 1;

	return ret;
}
Code Listing - Quaternion.lerp()
/**
 * Linear Interpolation
 */
public static Quaternion lerp(Quaternion from, Quaternion to, double time) {
	Quaternion ret = from*(1-time) + to*time;
	ret.normalize();
	return ret;
}
Code Listing - Quaternion.slerpNoInvert()
/**
 * Spherical Interpolation with no inversion
 */
public static Quaternion slerpNoInvert(Quaternion from, Quaternion to, double time) {
	double cosAngle = from.dotProduct(to);
	if(cosAngle < 0.95 && cosAngle > -0.95) {
		double angle = Math.Acos(cosAngle);
		double sinInvert = 1 / Math.Sin(angle);
		double fromScale = Math.Sin(angle * (1 - time)) * sinInvert;
		double toScale = Math.Sin(angle * time) * sinInvert;
		return from*fromScale + to*toScale;
	}
	else {
		return lerp(from, to, time);
	}
}
Camera Class
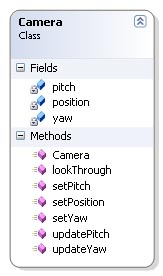
This class handles the camera code in my application. The class is very simple and doesn't need to be explained in great detail. The camera uses three variables to keep track of where it's pointing, position, yaw and pitch. The position is a vector which hold the position of the camera in respect of the origo of the scene. The two other variables each hold an angle which specifies the direction we're looking.
Future Improvements
This is my first attempt at making a skeletal animation system, so I've just started to scratch the surface of what's posible to do. There's alot more to be done before I'm satisfied with the result.
Interpolation Using Splines
One of the major concerns with my implementation today is that I use only SLERP and LERP to interpolate. This is fine enough for now, but it's relatively easy to notice that the animation is somewhat choppy. One of the reasons for this is that when we hit a keyframe a new interpolation is begun which results in a sudden change of direction. This can be solved in a number of ways, but the most compelling is to use a technique called squad or splines which is a kind of cubic interpolation.
Blending Animations
As mentioned my implementation doesn't fully support blending of animations at this point. I want to be able to add several mergeable animations and blend them using weights. This isn't that big of a problem really. To find the average between the animations I can just use a SLERP like algorithm. I'll just take the current rotation of the different animations and find the correct average based on the weights.
Dominant animations can also be improved. When you add a dominant animation today, the animation starts directly which can result in big abrupt change in the positure of the skeleton. I would like to add som kind of in between animation that interpolates the animated joints to the start frame of the dominant animation.
Performance
There's plenty of room for increasing the performance of my implementation. The code as it is today hasn't been programmed with performance in mind. I just wanted to check the functionality.
Conclusion
It has been a long road to get were my project is today. Writing the exporter was a challenge, and making the models and animations were even more demanding, but I'm quite pleased with the result. The technology works as expected. Actually a bit better then expected, and I've gathered some useful knowledge along the way. I can't wait to implement it all over again. In C++.'
